How to Make a Horus Mask
The third grade is studying Egypt at my son’s school. I’ve been pretty excited since Ancient Egypt has always been one of my favorite topics in history. After lazing around all weekend playing video games, watching videos and reading as little as we’d let him get away with, he came home from school and calmly said, “Hey, Mom, I need a Horus mask for school tomorrow.”
Calling upon my usual sang froid, my response was something along the lines of, “What?! It’s 4:45! And you need it tomorrow? OMFG!”
Finding Inspiration and Making a Plan
My mind raced looking for a solution. Too late for Amazon shipping. Party City? Alas, only adult Egyptian costumes available. Hmm, no way to simply purchase a solution.
It was a crafting emergency so we headed to Pinterest and quickly pinned some photos of bird masks and Horus costumes. We sketched a mashup design inspired by these projects:
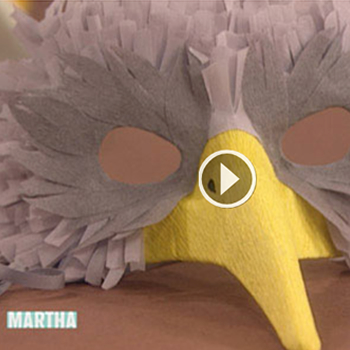
Martha Stewart Bird Mask Project
A Gorgeous Handmade Leather Mask by Merimask on Etsy

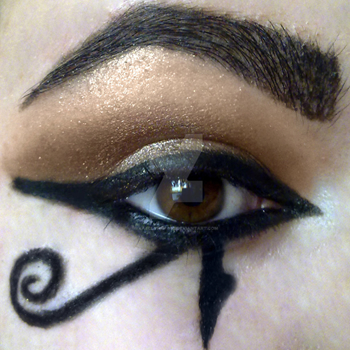
A Makeup Design by KatelynnRose on DeviantArt
The Supplies
So we went to searched the house and went to Michaels in search of supplies. Here’s what we used:
Michaels
- Ready made mask with cool eye holes
- Shiny gold Krylon spray paint
- Black, royal and turquoise felt squares
- Feathers – which we did not use after all
Stuff We Already Had
- Brown lining material
- Glue stick
- Black satin ribbon
- Yellow headband (liberated from his sister)
- Thread – blue and black (would have been better if we had gold)
Making the Horus Mask
We painted the mask with three coats of the shiny gold paint. While that was drying, my son cut strips of crape paper to make the “feathers” like on the Martha Stewart video. We also applied that technique to the strips of royal blue and turquoise felt to make an Egyptian style headdress. We decided that sewing the felt strips together wasn’t going to work well, so we found the lining material to use as a base. The brown color didn’t really work with our color scheme, so we decided to spray it with a quick coat of paint. That gave it a nice burnished gold look.
My son glued the paper strips to the mask using the glue stick and smooshed them up a little to make them feathery. Some were glued to the top and bottom of the mask from the front and we added a few rows glued to the back to make it fuller. Then we cut smaller eye holes from the black felt and glued it from the back of the mask to make the kohl outline effect for the eyes. This also made the eye holes a bit smaller and a better fit for a third grader.
We cut eyebrows, the teardrop/swirl design, and lines to extend from the outer corners of the eyes from black felt and glued them to the mask with the glue stick. We cut a beak from the black felt and I sewed a little tuck at the end to give it that hooked falcon shape. I also added the black satin ribbon for tying on the mask.
Making the Egyptian Headdress
Davis went to bed as I began machine hemming the edges of the painted lining material that would become the headdress base. Then I began sewing alternating rows of the blue and turquoise felt strips of “feathers.” I started at the bottom and slightly overlapped each row above to hide the stitching. Despite measuring before I started sewing, there was not quite enough blue by the time I got to the top so I added a row and a half of black felt feather strips at the top. It was still about a half an inch short so I folded over the hem across the top to make a gold band across the front of the headdress. (Oh, I meant to do that! That’s the ticket!)
This morning, my son and I measured the headdress and mask, then positioned an old padded headband a few inches behind the front of the headdress to help hold it in place. I hand whipped it to the back of the headdress. We also added a couple of small darts in the front to make it angle down over his forehead so it would stay behind the top of the mask. We also added two satin ribbon ties to the corners so he could tie it under his chin. This helped give it that nice draped Egyptian shape and helped keep it on.
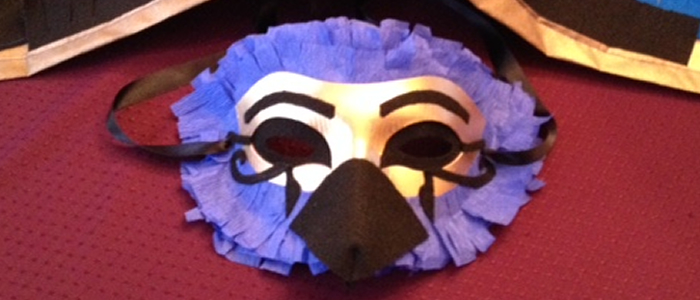
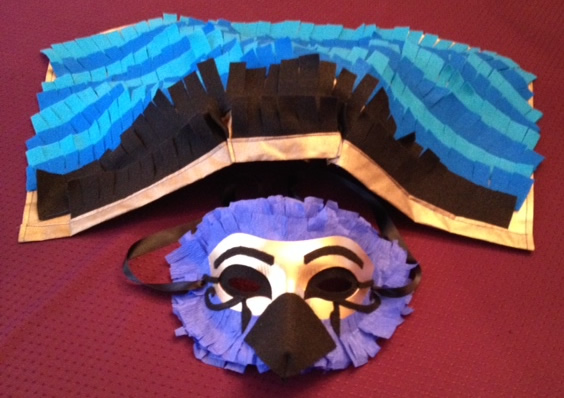
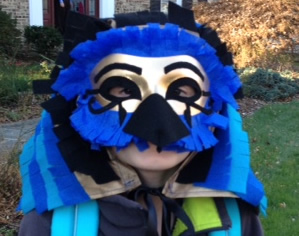
The Mask and Headdress are Finished!
We finished just in the nick of time to meet the school bus! Here are photos of the final project.
DIY Horus Mask and Egyptian Headdress
Davis Wearing His Cool New Mask to School
Post your comment